
Let’s start photoshop-ing! ♥
“There is a fountain of youth: it is your mind, your talents, the creativity you bring to your life.”
-Sophia Loren
HOW PHOTO EDITING STARTED
Photo editing is the process of changing an image or changing some part of it. Photo editing is done for many reasons and purposes. It is indeed a good strategy in the betterment of the photography industry. An example of this is the removing of unwanted blemishes and reconstructing body part from photos of models by using Photoshops.
The first photo editing happened in the 1980’s. It was the editing of the photo of President Abraham Lincoln. Computers and other high-technology things were not yet invented so people used ink, paint and airbrushes instead.
In the 1980s, photo editing computer programs for personal computers were made. The first version of Adobe Photoshop was released in 1987. Since then, it has become one of the most popular photo editing programs. It is so popular that many people now use the word “photoshop” to mean photo editing in general.
In 2011 the first photo editing mobile appswere released on App Store. First was Fotolr Photo Editor. Other apps have been made for other mobile operating systems. These apps allow easy editing and photo sharing by smartphone and tablet computer.
Nowadays, online free photo editing Web applications prevail, such as Flickr, Vectr, and FotoJet.
Professional photo editing is still dominated by Adobe Photoshop.
The following are my works done by using Adobe Photoshop:
A. Instant facial & make over!!!

This was our first task to do using Adobe Photoshop. The blur tool, smudge tool, dodge tool, spot-healing brush tool, healing-brush tool and the clone stamp tool were introduced to us and were specifically used to edit the the photo.
The task reveals how models have better exposure and looks by using Adobe photoshop to remove blemishes, hiding or removin unwanted body areas and adjusting image lightings, contrast, etc., as well as adding filters & effects.
The spot-healing brush tool was used to remove spots and unwanted objects from the image, specifically the freckles of the girl as observed in the “before” photo. After photo reveals the clearer and flawless result after the editing process.
B. Create your own banner dynamically!
“Editing cannot be taught. Developing your own taste cannot be taught.”
– Ellen Datlow
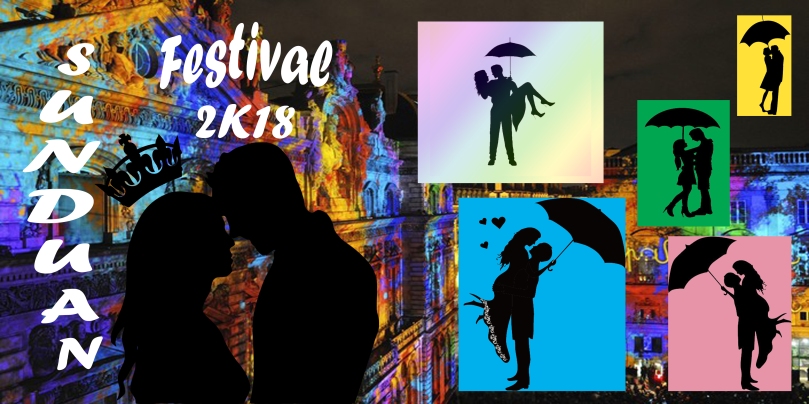
This was the Sunduan Festival (Parañaque) banner that I’ve made using Adobe Photoshop. It was my favorite activity during PS days because I learned how to make a banner that is a common thing in the commercial industry. I thought that the skills that I’ve learned from here can be very useful in the future. I used the magnetic lasso tool to select an area of the image I’ve chosen to recreate it in free-form shape. It attracts high-contrast edges around the shape; the paint bucket tool for changing the background of the images. It fills in the area that is similar to the color value of the pixels you click; I used the vertical type mask on inserting the text “Sunduan” & the horizontal type mask, text on custom shape to insert “Festival 2k18”. I also used the gradient tool, hand tool, zoom tool and etc.
C. PHOTOSHOP & TEAMWORK! YAY!
- “Teamwork is the ability to work together toward a common vision. The ability to direct individual accomplishments toward organizational objectives. It is the fuel that allows common people to attain uncommon results.” –Andrew Carnegie
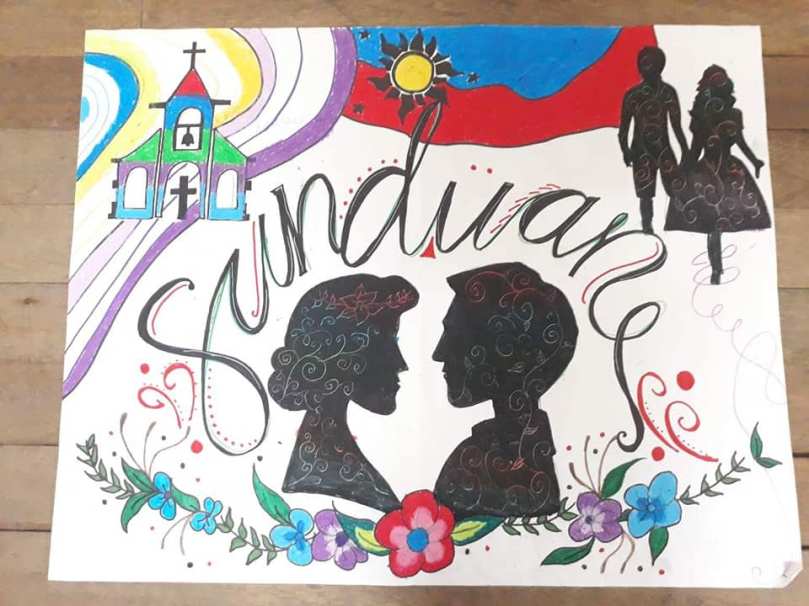

This was a collaborative work. We were tasked to draw a Parañaque Sunduan Festival banner using coloring & art materials on a cartolina. Afterwards, we should copy the created artwork in the form of PSD file using Adobe Photoshop. Evidently, the lasso tool, hand tool and type tool were used.
D. WATER REFLECTION
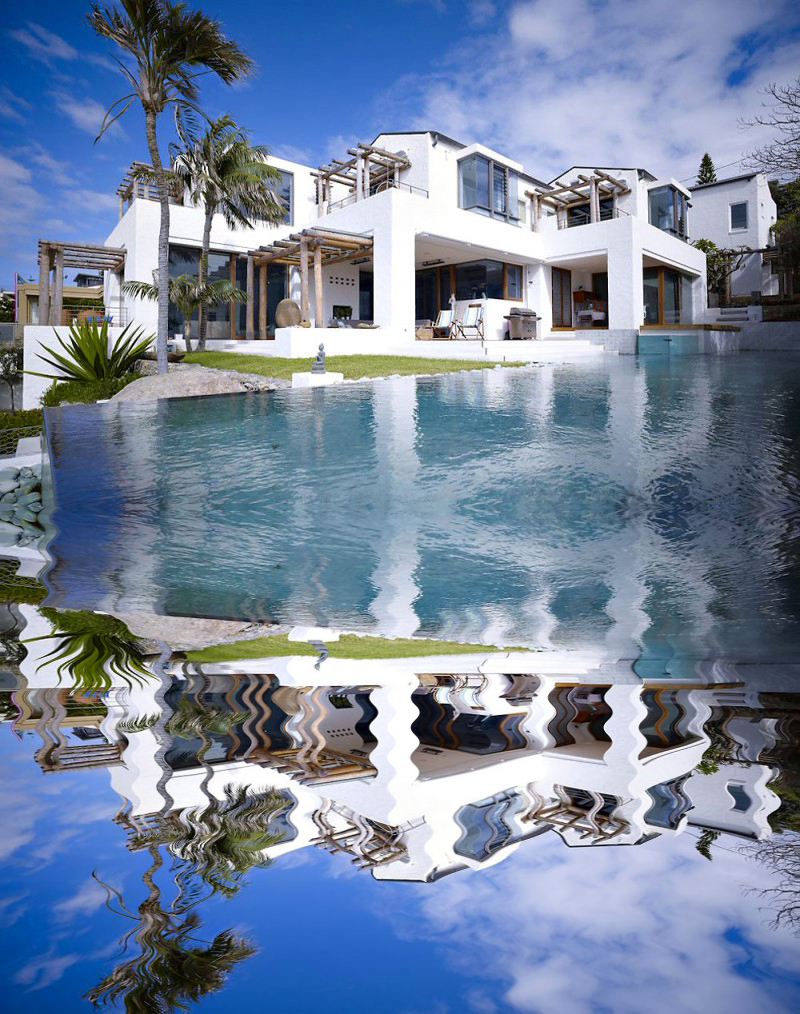
The water-reflection task is an example of using complex editing tools and effects using Adobe Photoshop. Some of the process includes changing the canvas size, transforming the image by flipping it vertically, using the move tool to drag the image and copy it, paint bucket tool,adding filters and etc.* The goal of the task was to create a realistic photo of an image with the water reflection at the bottom.
*For the complete tutorial please click here.
